
Nightstand Makeover

If you’ve read my 5 Style Tips for Shopping on a Budget, you know that I’m always trying to find ways to save money. That is why I love D.I.Y projects!
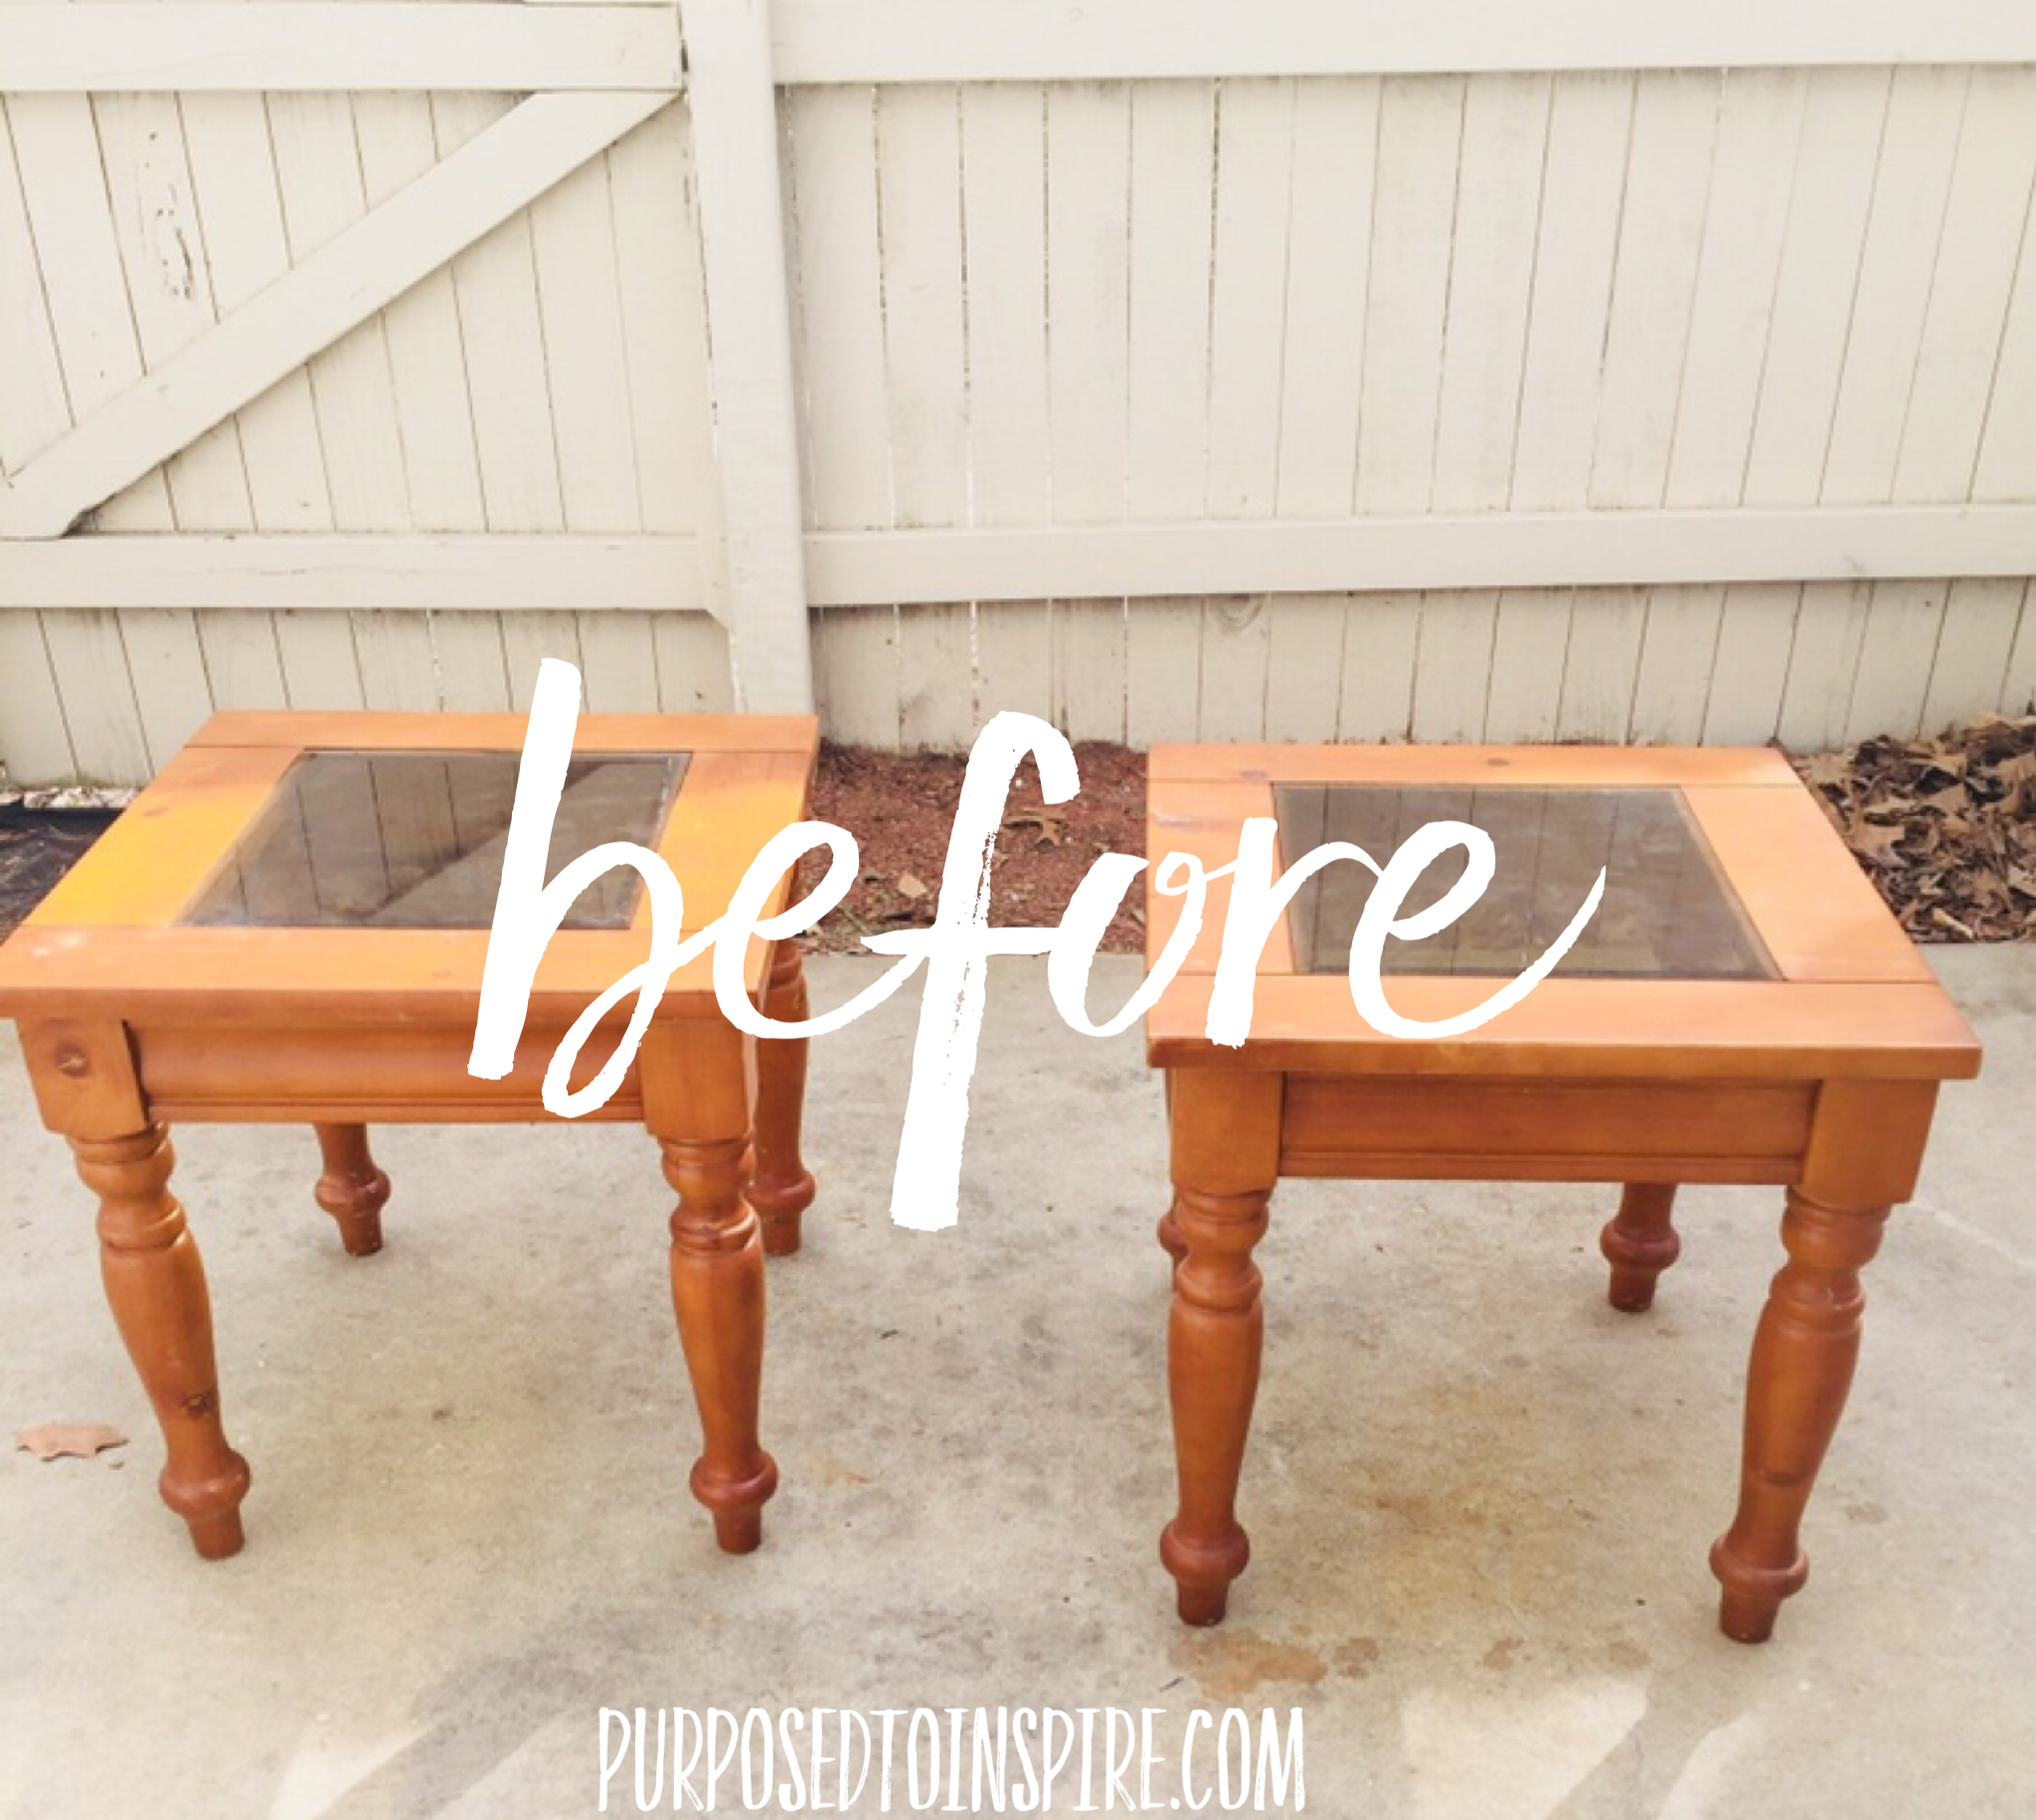
I needed two new nightstands for the master bedroom. I was having a hard time finding ones that I loved within budget. So, I decided to go thrifting!
I found two living room end tables at my local consignment shop, for $15 apiece. I figured these two tables would be perfect candidates for a makeover.
I wanted to keep the design simple to match the black, white and gold (my favorite colors) theme of my master bedroom. I decided to paint the tables a classic white.
Here’s how I did it.
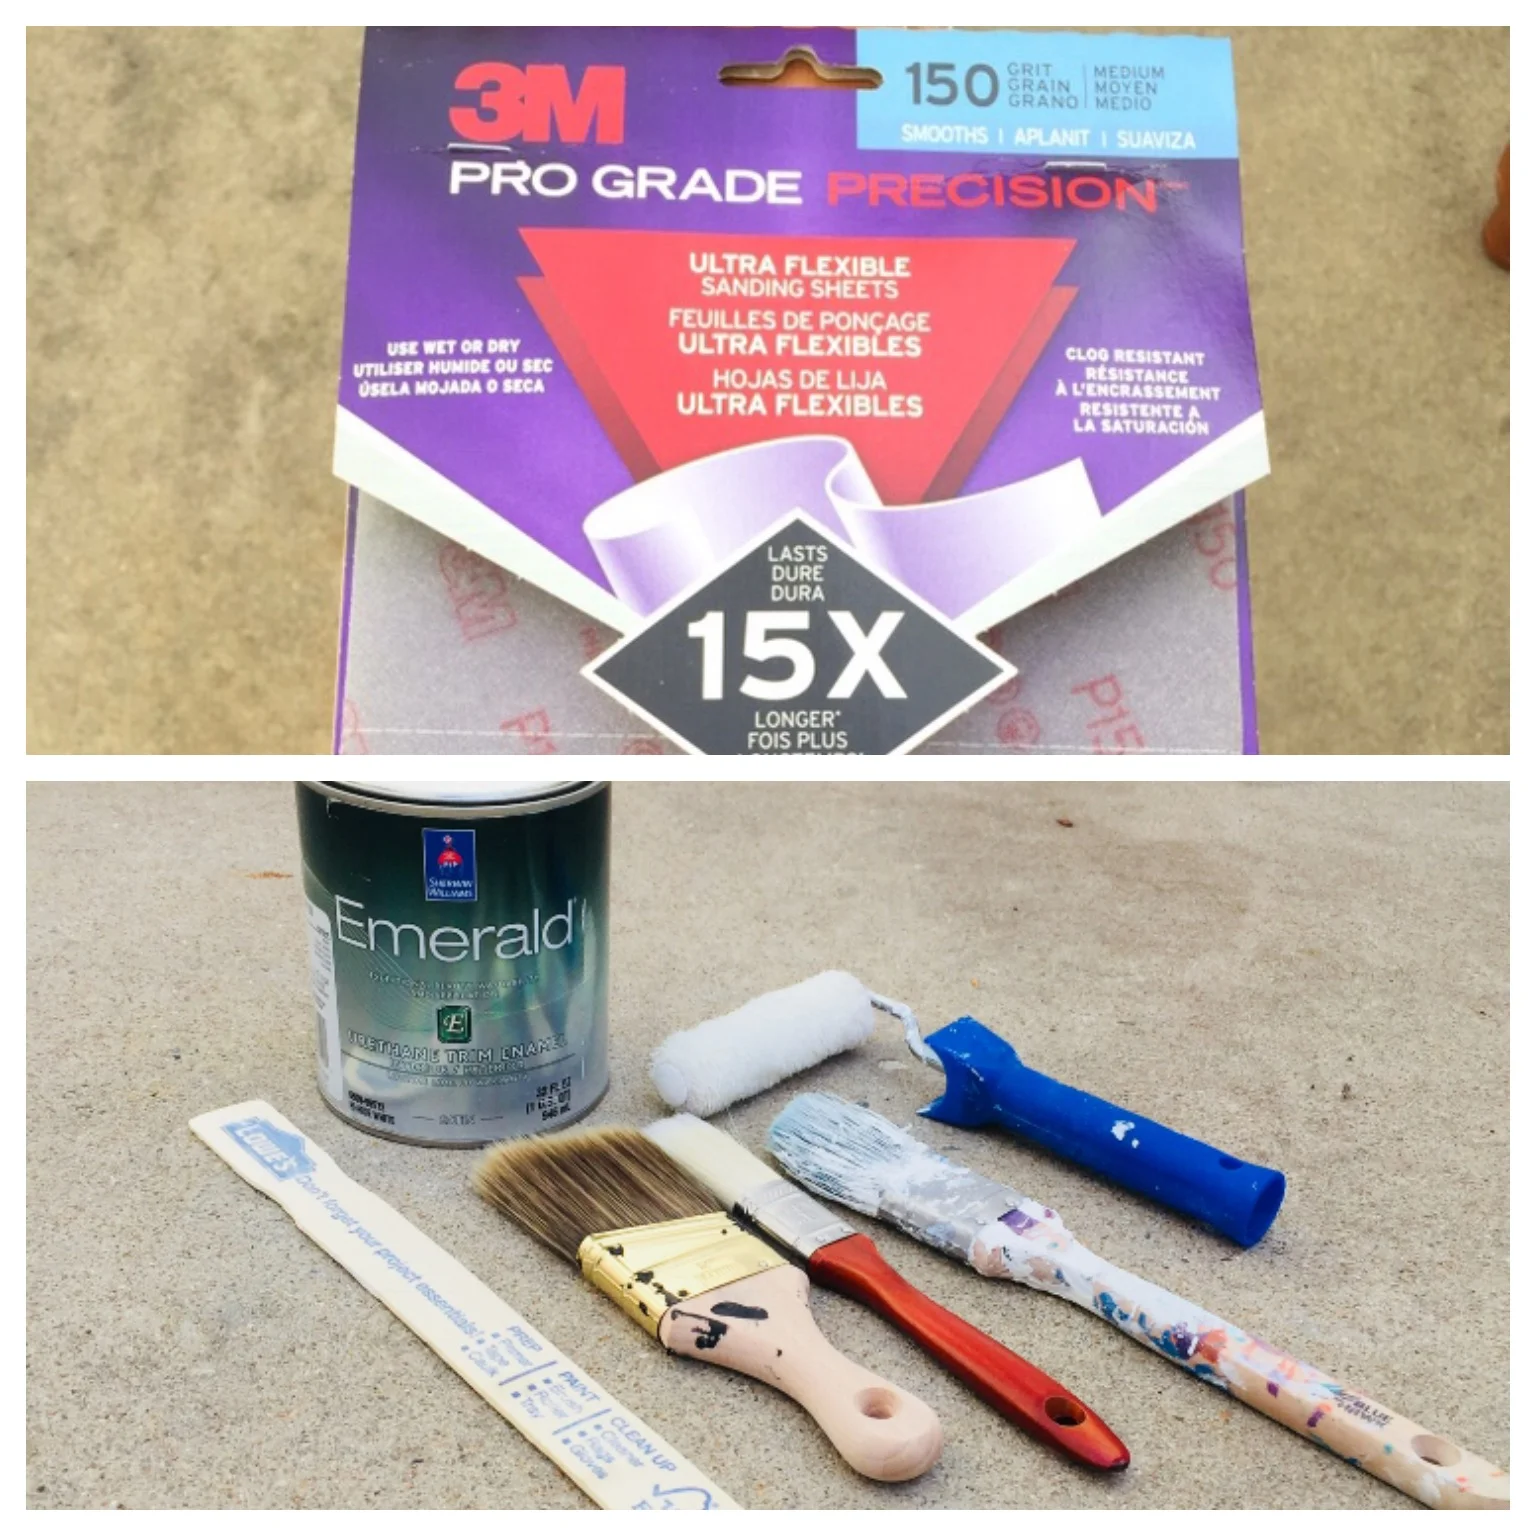
materials used:
-Sherwin William's White Emerald Trim Enamel Interior/Exterior Paint
-3M Pro Grade Precision 150 Grit Sanding Sheets
-Paint Stirring Stick
-1.5in Paint Brush
-Small Touch-Up Roller Sponge & Handle
Additional Materials(not pictured): Plastic Drop Cloths, Metal Paint Tray, Plastic Paint Tray Liner
The first thing you'll need to do is find a space to work, preferably somewhere with good ventilation. I decided to do this project outside on my patio.
First, I removed the glass inserts from the tables.
Next, I lightly sanded each table using a back and forth motion. Luckily, there were no major damages, knicks or scrapes on the tables. Since they were in pretty good condition, I didn't need to do much sanding.

I then cleaned off the surface using a damp cloth, and let dry.
My next step was to begin the painting process. Before I began painting, I laid out a piece of plastic drop cloth that I had left over from a previous project. This protected the patio from getting paint on it.
If you don't have plastic, you could also use an old sheet or blanket. Cardboard would work just fine as well.

Unfortunately, I didn't get any pictures of me painting the tables. Obviously, I was too busy getting paint in my hair. My daughter managed to snap a photo of the shocking moment she realized that my bun had rubbed up against the wet paint!

To paint, I alternated between the 1.5 inch paint brush and the touch up paint roller. I found the paint roller to be easier for the top surface of the desk, and the paint brush was easier to use when painting the legs. I only used two coats of paint to complete the project.
Helpful tip: Be sure to smooth the surface out completely when painting to avoid “drips”. If there are paint drippings on the furniture while it’s wet, it will remain there after it has dried. So, take your time.
I let the tables dry outside overnight, and the next morning they were perfect. This was a pretty simple project. From start to finish, this project took almost two hours to complete.
Here is the completed look!

“I try to see the beauty in everything. Even old beat-up furniture.”